Setting up a Shopify store in 2026 takes an afternoon — if you know what decisions to make and in what order.
Most beginner guides stretch this into an overwhelming list of sixty steps across seventeen screenshots. This one doesn’t. The goal here is to get you from zero to a store that can actually take orders, with every meaningful decision explained clearly enough that you understand why you’re making it, not just that someone told you to.
Let’s go.
Before You Touch Shopify: Two Things Worth Deciding First
Rushing into store setup without answering these two questions first is the reason most beginner stores look generic and convert poorly.
What is your store’s positioning? “I sell phone cases” is not positioning. “I sell minimalist phone cases for people who hate bulky wallets” is positioning. Before you pick a theme, write a product description, or choose a color palette, you need to know who specifically you’re selling to and why they should buy from you rather than Amazon. This decision shapes every aesthetic and copy choice that follows.
What do you want the store to feel like? Go to three or four stores that sell products adjacent to yours — not direct competitors, but stores whose aesthetic you respect. Screenshot their homepage. Notice what they have in common: the amount of white space, the typography style, the way they use photography. You’re not copying them; you’re developing taste calibration before you start making visual decisions. This takes twenty minutes and will save you hours of aimless theme browsing.
With those answered, open Shopify.
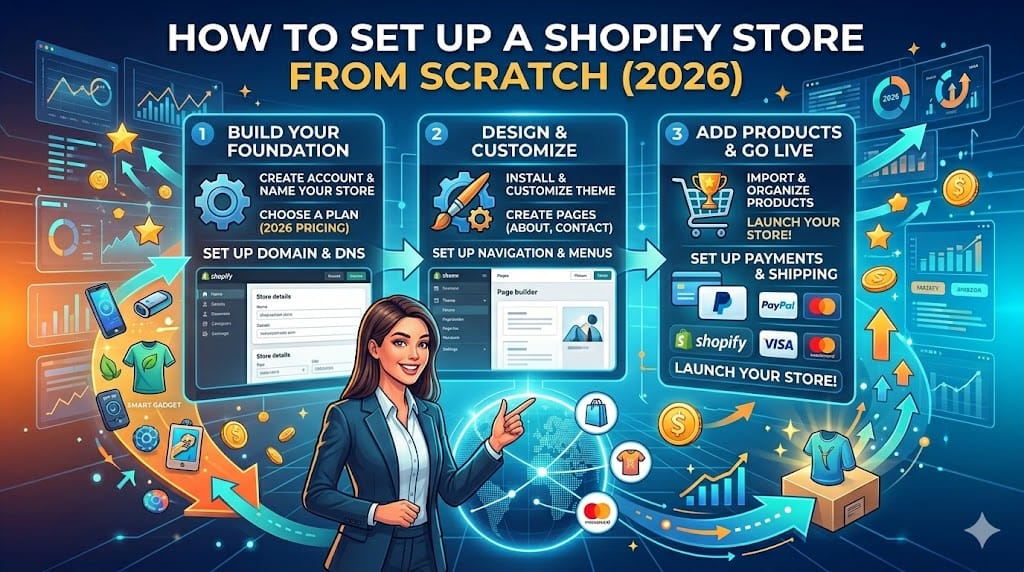
Step 1: Create Your Account and Choose a Plan
Go to shopify.com and start a free trial. In 2026, Shopify offers a three-day free trial followed by a $1/month introductory period for the first three months on most plans — plenty of time to build your store before committing.
When the trial ends, you’ll choose a paid plan. For most beginners, the Basic plan at $39/month (or $29/month on annual billing) covers everything you need. It includes unlimited products, two staff accounts, basic reports, and Shopify Payments. The only reason to upgrade to the $105/month Shopify plan early is if you need more detailed analytics or lower transaction fees at meaningful revenue volume — which you don’t yet.
One note on billing cycle: if you’re confident in your store concept, annual billing at $29/month saves you $120 over the year. If you’re still validating, monthly keeps your commitment lower while you figure out whether the product has legs.
Step 2: Set Up Your Store’s Basic Information
Before you pick a theme or add products, fill in the foundational settings. These affect your taxes, your domain, and how your store appears in Google.
Store name: This appears in your browser tab and in email notifications to customers. It can be changed later, but consistency matters — pick something you’ll stick with.
Store currency: Set this to your primary selling currency. Changing it later recalculates all your prices and can create inventory inconsistencies if you’ve already added products.
Time zone and units: Set these to your location. Shipping weight units and date formats on reports will be wrong if you skip this.
Legal pages: Shopify can auto-generate Privacy Policy, Terms of Service, and Refund Policy pages under Settings → Policies. Use the generators as a starting point, but read through them and customize them for your specific business — particularly the refund policy, which should reflect what you’re actually willing to honor rather than a generic template.
Step 3: Choose and Customize Your Theme
Your theme is the visual framework of your store. It determines layout options, typography hierarchy, and how product pages and collections are structured. Choosing the right one upfront is significantly easier than migrating to a different theme after you’ve customized everything.
The free themes are better than most people think. Shopify’s free themes — Dawn, Sense, Craft, Refresh — are fast, mobile-optimized, and maintained by Shopify’s own design team. For a new store, starting with a free theme and putting your budget into products and marketing is the right call. Paid themes make sense when you have specific feature requirements (advanced filtering, sophisticated product customization options) that the free themes don’t support.
How to choose: In the Shopify Theme Store, filter by your store type (fashion, electronics, home goods, etc.) and look for themes with demo stores that have a similar product density to yours — a theme designed for a one-product store looks wrong with fifty products, and vice versa.
Customization priorities in the theme editor (Online Store → Themes → Customize):
Colors: Set your primary color, secondary color, and button color. These should come from your brand palette — if you don’t have one, pick two colors that complement each other and use them consistently. Shopify’s theme editor applies color changes globally, so you only set them once.
Typography: Choose a heading font and a body font. A practical rule: use a personality font for headings (something slightly distinctive that reflects your brand) and a highly readable font for body text. Don’t use more than two typefaces — it looks amateur and slows page load.
Header and navigation: Add your logo (if you have one) or set a text logo. Create your main navigation menu under Online Store → Navigation. Keep it simple: Home, Shop (or your main collection), About, Contact. Buyers who can’t find what they’re looking for in three clicks leave.
Homepage sections: Most Shopify themes let you add, remove, and reorder homepage sections. A high-converting basic homepage typically includes: a hero banner with a clear value proposition and call-to-action, a featured collection or bestsellers section, a brief “why us” section with three to four differentiating points, and a footer with contact information and links to your legal pages.
Step 4: Add Your Products
Go to Products → Add product. For each product you add:
Title: Clear, specific, keyword-aware. “Minimalist Leather Card Holder — 4 Slots, RFID Blocking” performs better in both search and conversion than “Slim Wallet.” Include the key attributes buyers search for.
Description: This is where most store owners do the minimum and lose sales as a result. Write for the buyer, not the search engine. Lead with the primary benefit — what problem does this product solve? Follow with specific features (materials, dimensions, compatibility, care instructions). Close with a clear reason to buy now rather than continue browsing. Three to five paragraphs is usually the right length for a physical product.
Images: Add a minimum of three images per product — a clean white-background hero shot, a lifestyle/context shot showing the product in use, and a detail shot showing texture, dimensions, or a key feature. Image quality directly affects conversion rate. Blurry or poorly lit photography communicates that the rest of the operation is also not professional.
Pricing: Set your price and, if you want to show a strikethrough “compare at” price, your original/compare-at price. Only use compare-at pricing if the comparison is genuine — if you’re showing a 40% discount that was never real, you’re eroding trust rather than building urgency.
Inventory and SKU: Enable inventory tracking if you’re holding physical stock. Assign SKUs if you have multiple variants — this makes order management and supplier communication significantly cleaner as you scale.
Variants: If your product comes in different sizes, colors, or configurations, add them as variants rather than separate products. This keeps your catalog organized and allows stock tracking per variant.
SEO listing preview (at the bottom of the product page): Edit the meta title and description for every product you add. Shopify auto-populates these from your product title and description — which is rarely optimal. Write a meta title under 60 characters and a meta description under 156 that describe the product and include the primary keyword a buyer would search.
Step 5: Organize Products Into Collections
Collections are how buyers navigate your store. Go to Products → Collections and create logical groupings.
Automated collections add products automatically based on rules (product tag, price, title contains certain text). Useful once you have a large catalog. Manual collections let you handpick which products appear. Better for a small catalog where you want control over exactly what a buyer sees.
Create a “All Products” collection as a fallback, plus specific collections for any meaningful category splits you have — by product type, by use case, by price range. Link your collections in your navigation.
Step 6: Set Up Payments
Go to Settings → Payments.
Shopify Payments is the default and simplest option if you’re in a supported country (US, UK, Canada, Australia, most of Europe). It’s built directly into Shopify, requires no third-party account, and eliminates the additional transaction fee Shopify charges when you use external processors. Activation requires entering your banking details and personal verification information — have your bank account number and ID ready.
PayPal: Enable this as a secondary payment option even if you use Shopify Payments. A meaningful percentage of buyers prefer PayPal — particularly for larger purchases where they want purchase protection — and not offering it causes measurable cart abandonment.
Test your checkout before going live. Shopify provides a test mode that processes a fake transaction through the full checkout flow. Run it. Check that the confirmation email arrives correctly, that the order appears in your dashboard, and that the thank-you page shows the right information. Discovering a broken checkout after real customers try to buy is both embarrassing and costly.
Step 7: Configure Shipping
Go to Settings → Shipping and delivery.
Shipping zones: Define which countries or regions you ship to. Start with the markets you can reliably fulfill — trying to ship globally before you understand your carrier options and costs creates a customer service nightmare.
Shipping rates: You have three main options.
Free shipping converts best — buyers strongly prefer it and it reduces cart abandonment. The catch is that you need to build shipping cost into your product pricing to maintain margin. If your average order value is $40 and shipping costs $6, you either raise prices $6 (and compete on the higher price) or offer free shipping and absorb the cost (which works if your margin can accommodate it).
Flat rate shipping is predictable for customers and simple to manage. Set a rate that covers your average shipping cost — you’ll overshoot on some orders and undershoot on others, but it averages out.
Carrier-calculated shipping shows buyers the exact real-time rate from your carrier (UPS, USPS, FedEx, etc.) based on their location and order weight. Most accurate but can deter buyers who see unexpectedly high rates for heavy products or distant locations.
A practical starting point for most new stores: offer free shipping on orders above a threshold (something like $50 or $75) and a flat rate for orders below it. This incentivizes larger order values while keeping the economics manageable.
Step 8: Connect a Custom Domain
Your store launches on a your-store-name.myshopify.com subdomain. That’s fine for testing but signals “brand new and unestablished” to buyers. A custom domain takes ten minutes to connect and costs $10–$15/year.
You can buy a domain directly through Shopify (slightly more expensive but automatically configured) or through a registrar like Namecheap or Google Domains and connect it manually under Settings → Domains.
If you buy externally, you’ll need to update your domain’s DNS settings — specifically pointing the A record and CNAME record to Shopify’s servers. Shopify provides these values in the domain setup screen. DNS changes take up to 48 hours to propagate fully, though they usually complete within a few hours.
Step 9: Pre-Launch Checklist
Before you remove the password page and go live, run through this list:
- All products have at least three images, full descriptions, and edited SEO meta fields
- Legal pages (Privacy Policy, Terms of Service, Refund Policy) are published and linked in footer
- Checkout tested end-to-end in test mode
- Custom domain connected and resolving correctly
- Contact page live with a working email address
- Mobile display checked on an actual phone — not just the browser responsive preview
- At least one shipping zone configured with rates
- Shopify Payments (or alternative) activated and verified
- Password page removed: Online Store → Preferences → Password protection → uncheck
That last step is the one most people forget. Your store can be fully configured and technically perfect — but if the password page is still active, nobody can see it.
The First 48 Hours After Launch
Going live is not the finish line. The first two days tell you a lot about what needs fixing.
Check Google Search Console and submit your sitemap (your-domain.com/sitemap.xml) for indexing. Share your store URL in at least three places where your target customer spends time online. Monitor your checkout analytics for drop-off points — if buyers are adding to cart but not completing purchase, something in your checkout flow needs attention.
Shopify’s analytics dashboard shows sessions, add-to-cart rate, and checkout conversion rate from day one. These three numbers, tracked weekly, will tell you more about what to fix than any other metric you can watch.
Up next: Keyword Research — Free Tools + Step-by-Step Guide — how to find the exact phrases your audience searches for, before you write a single word of content.